
The excavator bucket is one of the most frequently used parts of the excavator in operation. The bucket is also the fastest wearing part and needs to be replaced frequently. Excavator bucket replacement is a technical task that requires operators to pay attention to many things in order to complete the operation without damaging the machine or injuring personnel. What are the precautions for replacing an excavator bucket? In this article, we will guide you through the process of changing a bucket on an excavator.
The operation steps are as follows:
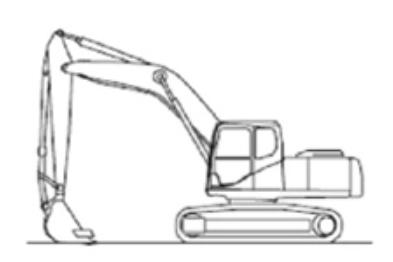
STEP 1: BUCKET DOWN ON A FLAT GROUND
The first step is to lift the bucket up off the ground. In the process of putting the bucket, make the bucket just contact with the ground so that there is less resistance when removing the pin.
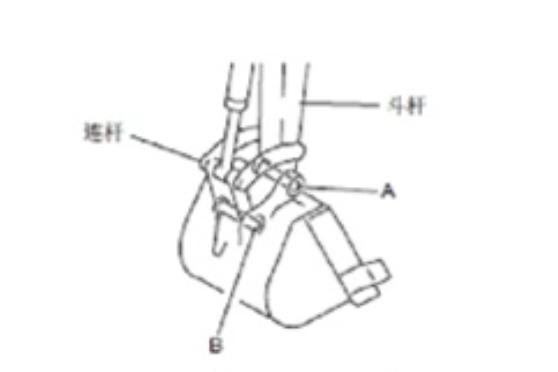
STEP 2: REMOVE THE SAFETY PIN
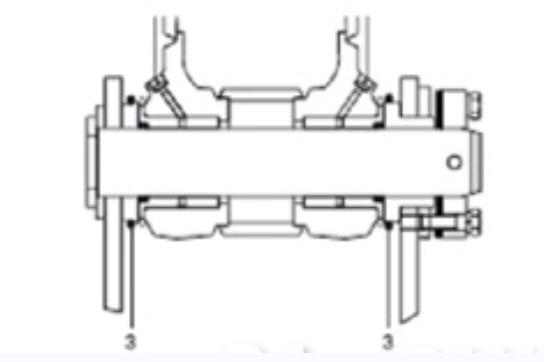
Second, remove the double nuts on the bucket safety pin [A] and connecting safety pin [B] stopper bolts, remove the bolts and pull out the bucket safety pin [A] and connecting safety pin [B]. After removing the pins, make sure not to get mud or sand on the pins. The ends of the bushings are equipped with dust seals, so be careful not to damage them.
STEP 3: REMOVE THE BUCKET
Once you have removed the bucket pin, you can crawl the hitch out all the way till the bucket drops on to the ground.
STEP 4: PREPARING TO PICK UP THE BUCKET
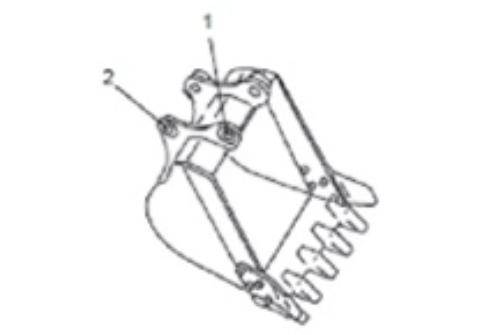
Align the bucket pin with the hole (1) of the replacement bucket and the connecting pin with the hole (2). Then, insert greased pins [A] and [B] into holes (1) and holes (2) respectively. When installing the bucket, for the bucket pin part [A], install the bucket O-ring (3) into the position shown in the figure. After inserting the pin, fit it into the standard slot.
STEP 5: PICK UP THE BUCKET AND REPLACE SAFETY PIN
Install the locking bolts and nuts of each pin, and then apply grease to the pins and you are ready to work.
ADDITIONAL TIPS:
1. When striking a pin with a hammer, metal chips can fly into the eyes and cause serious injury. When performing this operation, always wear goggles, helmet, gloves and other protective equipment and ensure the safety of those around you.
2. When removing pins, be especially careful not to stand under the bucket or put your feet or any part of your body under the bucket; when removing or installing pins, be careful not to put your fingers into the pin holes.
3. When unloading the bucket, place the bucket in a stable position.
4. For safety reasons, clarify signals and work carefully with each other when performing connection work with the personnel involved in the connection work.
CONCLUSION:
The above are the steps and precautions for replacing the excavator bucket, do not comply with the above precautions in actual operation, and cause casualties, it is not worth the loss!
FAQ:
1. Are excavator buckets interchangeable?
In short; no. However, there are times where machine fitments are often crossed over, so buckets that fit on one machine, will also work on other machines. For example, a standard JCB 801 bucket, will fit on a standard Kubota KX36 machine, or a Bobcat X335 will also fit a Volvo ECR58 machine.
2. Are all excavator buckets the same?
Every machine is different! Pin centers and ear widths often differ between machine makes and models, so most of the time excavator buckets are not universal.
3. What are typical excavator bucket sizes?
1-ton to 1.9-ton machine: Bucket widths of 6 inches to 24 inches, or grading buckets 36 inches to 39 inches. 2-ton to 3.5-ton machine: Bucket widths of 9 inches to 30 inches, or 48-inch grading buckets. 4-ton machine: Bucket widths of 12 inches to 36 inches, or 60-inch grading buckets.
4. What is the difference between a ditching bucket and a grading bucket?
A grading bucket is ideal for leveling and smoothing out soil because it's wider without causing an increase in weight. A ditching bucket is better suited for maintaining ditches and in construction because it has a smooth front edge. This bucket type is ideal for soil that's free of roots or rocks.
If you have any further questions, you can always contact our technical experts by clicking here.